Go Back   Maxum Boat Owners Club - Forum > Maxum General > Projects and Customisations
Click Here to Login
Register FAQ Community Calendar Today's Posts Log in

Reply
 
Thread Tools Search this Thread Display Modes
 
Old 08-01-2017, 02:30 AM   #1
Lieutenant
 
Join Date: Jun 2015
Location: Richmond, VA
Posts: 51
Default Cockpit A/C

I tapped off the aft berth with a new 4" T connector to the A/C vent and inserted a quiet blower and switch for a refreshing cockpit oasis. The first mate really appreciates this when we are buttoning her up for the night or ebd of the weekend!
Attached Thumbnails
0422171835.jpg  
__________________

cbswaim is offline   Reply With Quote
Old 08-01-2017, 02:33 AM   #2
Admiral
 
mmwjr's Avatar
 
Join Date: Feb 2012
Location: Essex, Maryland
Posts: 10,632
Default

That's a large volume to cool for one vent, guess it may do the trick in the evening but not in daytime sun.
__________________

__________________
1997 Silverton 362, 7.4 Crusaders
1997 2400 SCR, 5.7 Vortec / Bravo 2

Mike
mmwjr is offline   Reply With Quote
Old 08-01-2017, 02:40 AM   #3
Lieutenant
 
Join Date: Jun 2015
Location: Richmond, VA
Posts: 51
Default

Correct - it will not cool the volume in the summer, but even when the enclosure is open, it provides a very cool breeze when happy hour starts. I suspect it will extend our seasons because it will provide enough heat to take the edge off too. It can be directed to blow directly into the aft seating around the pedestal table. Not a back return on a $75 project.
cbswaim is offline   Reply With Quote
Old 11-07-2017, 05:03 AM   #4
Lieutenant
 
Join Date: Jul 2017
Location: NC
Posts: 78
Default

By any chance do you have the list of material you used for this project P/N or location to get them from? and most important how did you reach that spot from the AFT area.Sorry I am newbie on the boat, but I really like the idea .. The silent fan was a 5volt (computer style one ) ?

Thank you ,
Jose
marcucho is offline   Reply With Quote
Old 11-07-2017, 11:49 AM   #5
Lieutenant
 
Join Date: Jun 2015
Location: Richmond, VA
Posts: 51
Default

Hi Marcucho -

I couldn't find part numbers since I used so many sources or spare parts on hand, but hopefully this will help. You didn't mention your boat model, but mine is a 1998 2800 SCR, so I was able to access the existing duct in the compartment at the foot of the aft cabin. There is an internal vent there and with the removal of a couple pieces inside the storage at the foot of that bed could get to the cockpit vent location I wanted. The duct "T" came from online Marine or RV air conditioning parts supplier. Here's what I used:
1. 4" duct T to split the vent supply from the aft berth vent
2. A quiet blower fan (Amazon) normally used for venting engine compartments
3. 4" insulated ducting (important to not use dryer duct tubing since it will build up moisture and mold) - got this from Home Depot
4. Had an illuminated push button electrical switch on hand to turn the blower on and off. Any switch will do and there are many options on Amazon.
5. A 4" duct vent with damper (very important when you need to turn off the cockpit vent, otherwise all of you heat or AC will not work inside when you need it). Found it on Amazon, but there are numerous sources to match your other AC vents.
6. Two conductor marine wire and an inline fuse (check the blower requirements). This wire went directly to the engine compartment to hook to the house battery.

You could alternatively run the electrical wire to the helm switch bank. I chose to place the switch by the vent so my first mate hand an intuitive switch to turn on and off, rather than having to get up to go to the helm and find it. Hope this helps!
__________________
- Chuck
cbswaim is offline   Reply With Quote
Old 11-07-2017, 02:34 PM   #6
Moderator

 
shrew's Avatar
 
Join Date: Apr 2008
Posts: 5,691
Default

If the cockpit canvas is closed, the heat from the cabin below will rise and heat the cockpit space simply by leaving the cabin door open. Obviously the same doesn't work for the AC though.

Nice work!!
shrew is offline   Reply With Quote
Old 11-07-2017, 03:29 PM   #7
Lieutenant
 
Join Date: Jun 2015
Location: Richmond, VA
Posts: 51
Default

Hi Shrew - Your assessment is basically correct regarding heat I will say that based on the desired effects from the first mate, having a forced-air option with direction control makes her happier than a passive system! If the first mate ain't happy, the captain's not happy!
__________________
- Chuck
cbswaim is offline   Reply With Quote
Old 11-07-2017, 04:33 PM   #8
Admiral
 
Phillbo's Avatar
 
Join Date: Mar 2012
Location: Lake Powell
Posts: 1,613
Default

Nice install....
Phillbo is offline   Reply With Quote
Old 11-07-2017, 06:10 PM   #9
Lieutenant
 
Join Date: Jul 2017
Location: NC
Posts: 78
Default

Quote:
Originally Posted by cbswaim View Post
Hi Marcucho -

I couldn't find part numbers since I used so many sources or spare parts on hand, but hopefully this will help. You didn't mention your boat model, but mine is a 1998 2800 SCR, so I was able to access the existing duct in the compartment at the foot of the aft cabin. There is an internal vent there and with the removal of a couple pieces inside the storage at the foot of that bed could get to the cockpit vent location I wanted. The duct "T" came from online Marine or RV air conditioning parts supplier. Here's what I used:
1. 4" duct T to split the vent supply from the aft berth vent
2. A quiet blower fan (Amazon) normally used for venting engine compartments
3. 4" insulated ducting (important to not use dryer duct tubing since it will build up moisture and mold) - got this from Home Depot
4. Had an illuminated push button electrical switch on hand to turn the blower on and off. Any switch will do and there are many options on Amazon.
5. A 4" duct vent with damper (very important when you need to turn off the cockpit vent, otherwise all of you heat or AC will not work inside when you need it). Found it on Amazon, but there are numerous sources to match your other AC vents.
6. Two conductor marine wire and an inline fuse (check the blower requirements). This wire went directly to the engine compartment to hook to the house battery.

You could alternatively run the electrical wire to the helm switch bank. I chose to place the switch by the vent so my first mate hand an intuitive switch to turn on and off, rather than having to get up to go to the helm and find it. Hope this helps!

Chuck , Thank you for your quick response. I forgot to say that I have a 2000 2800 SCR so we should have the same air duct distribution. I have attached a picture where I am going to connect the T to get the other line going to the cockpit. Thats going to be the tricky because all the wood cabinet is there on the AFT foot area and I know that it can be removed, but getting 4 " pipe behind the cabinet its going to be interesting. Thank you Chuck for the information provided. Time to gather some parts


Thanks,
Jose
Attached Thumbnails
AFT_Air_duct.jpg  
marcucho is offline   Reply With Quote
Old 11-08-2017, 03:45 PM   #10
Lieutenant
 
Join Date: Jun 2015
Location: Richmond, VA
Posts: 51
Default Parts for Cockpit A/C install

Hi I found some links to parts I used:

Blower
https://www.amazon.com/gp/product/B0...?ie=UTF8&psc=1

Switch
https://www.amazon.com/gp/product/B0...?ie=UTF8&psc=1

Switch Wiring Pigtail/Harness (this really simplified the switch wiring
https://www.amazon.com/gp/product/B0...?ie=UTF8&psc=1

Wire
https://www.amazon.com/gp/product/B0...?ie=UTF8&psc=1

4" Hole saw that comes in handy for this and other projects
https://www.amazon.com/gp/product/B0...?ie=UTF8&psc=1

Since I was putting wiring in the aft cabin, I also added a separate fan
https://www.amazon.com/gp/product/B0...?ie=UTF8&psc=1

If you have any issues seeing these devices, let me know and I'll get some screen captures (out of town right now and using an iPad that doesn't let me do this easily). - Chuck
__________________
- Chuck
cbswaim is offline   Reply With Quote
Old 11-08-2017, 03:52 PM   #11
Lieutenant
 
Join Date: Jun 2015
Location: Richmond, VA
Posts: 51
Default

Hi Marcucho - This looks similar,but not quite the same. (It does look like your drain hose needs to be shortened to remove the kink.) You should also be able to access this duct by removing the "floor" of the locker where the shore power breaker panel is located. Doing this will allow you build your T assembly and then connect it via a simple union/coupler.

Yes, getting the duct reattached to the existing aft bunk vent took patience (I'm a 6' 280# guy). What helped me was using duct zip ties rather than the usual dryer vent clamps (metal bands with tightening screws).
__________________
- Chuck
cbswaim is offline   Reply With Quote
Old 11-08-2017, 03:57 PM   #12
Lieutenant
 
Join Date: Jun 2015
Location: Richmond, VA
Posts: 51
Default

IMPORTANT: You need to make sure to use wiring/cabling support when you put the electrical wiring up to the switch. These are the little plastic wire holders that have a screw to secure the wire to the walls. I made sure to add a horizontal bend in the wiring run to relieve downward pulling created by hitting wakes and boating in general. As mentioned, while this install is very basic and straight-forward, it does take time and can be tedious due to the small working space. You will want to do this install once and done, so using cabling supports will really help keep you from troubleshooting and remediation get later!
__________________
- Chuck
cbswaim is offline   Reply With Quote
Old 11-21-2017, 03:39 AM   #13
Lieutenant
 
Join Date: Jul 2017
Location: NC
Posts: 78
Default

Quote:
Originally Posted by cbswaim View Post
IMPORTANT: You need to make sure to use wiring/cabling support when you put the electrical wiring up to the switch. These are the little plastic wire holders that have a screw to secure the wire to the walls. I made sure to add a horizontal bend in the wiring run to relieve downward pulling created by hitting wakes and boating in general. As mentioned, while this install is very basic and straight-forward, it does take time and can be tedious due to the small working space. You will want to do this install once and done, so using cabling supports will really help keep you from troubleshooting and remediation get later!
Chuck thanks for the help with this project. I already have some parts @ the boat. (Fuses,cables,air duct)..today I just got the rest of the parts today.. now time to get some patience hehehe..and hand on this project..

Thank Jose

Sent from my SM-G935V using Tapatalk
marcucho is offline   Reply With Quote
Old 11-21-2017, 12:54 PM   #14
Lieutenant
 
Join Date: Jun 2015
Location: Richmond, VA
Posts: 51
Default

If I had put everything in a box, it would have looked like this! One other suggestion though - I made sure to use white silicone to seal around the vent when I installed it. I also used a large rubber washer to cushion the switch or you could also use silicone there too.

Best wishes for a successful install!
__________________
- Chuck
cbswaim is offline   Reply With Quote
Old 04-09-2018, 08:06 PM   #15
Lieutenant
 
Join Date: Jul 2017
Location: NC
Posts: 78
Default My on going Air duct Project

OK so this is a project that still going, but I wanted to share some of the pictures to get an idea what is involved running AC air duct to the cockpit on a 2000 2800 SCR
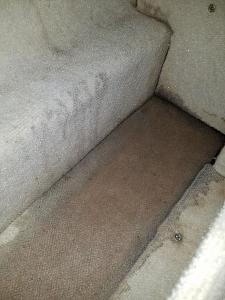
I found some old pictures I took when I bought the boat. You can see the water mark on the AFT area. ( I wanted to show the AFT closet “Port Side” where the main work its going to be happening)
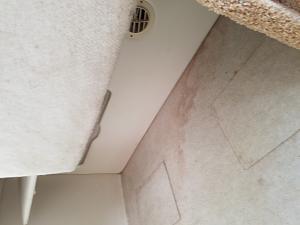
Click image for larger version

Name:	20170730_163710.jpg
Views:	7
Size:	90.4 KB
ID:	5376
Click image for larger version

Name:	IMG-20170809-WA0005.jpg
Views:	5
Size:	324.4 KB
ID:	5377
After the wall is removed in the AFT closet area you are going to see this ( Air Duct and the drainpipe from the cockpit (Sorry I do not know how to rotate the pictures )
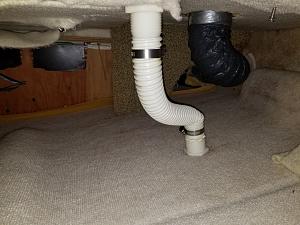
Click image for larger version

Name:	20180321_194906 (1) (1).jpg
Views:	5
Size:	239.4 KB
ID:	5378
Next picture the upper wook was set back (do not forget to tight all the cables . we do not want cables moving and shafting
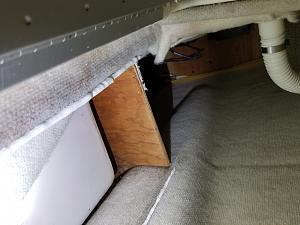
Click image for larger version

Name:	20180321_194738 (1) (1).jpg
Views:	6
Size:	158.0 KB
ID:	5379
You Also are going to find a lot of the nasty mold so be ready to clean as much as you can, Tylex mold removed worked like champ
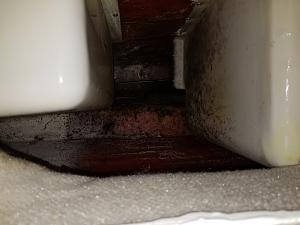
Click image for larger version

Name:	20180321_200118 (1) (1).jpg
Views:	6
Size:	125.7 KB
ID:	5380


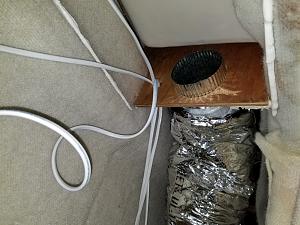
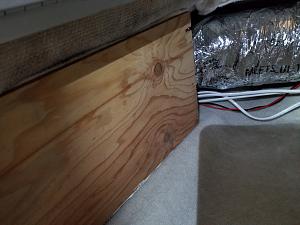
After I did all the connection on the ‘T” I bought for the air duct. Here what it looks like on the closet area. Original AFT air duct still the same way I just used some new duct tape to reattach it to the air Aft vent

Click image for larger version

Name:	20180325_161324[1].jpg
Views:	4
Size:	127.3 KB
ID:	5394Click image for larger version

Name:	20180326_171412.jpg
Views:	4
Size:	255.2 KB
ID:	5382
ON the piece of wood I have to drill a 4” hole and add a air ductpiece to attach the other end of the air duct going to the vent on the cockpit
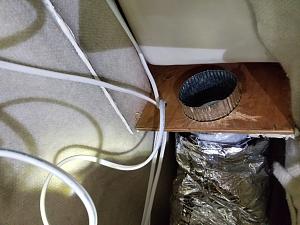
Click image for larger version

Name:	20180326_171320.jpg
Views:	4
Size:	184.3 KB
ID:	5383


Here is the other end of the air duct going to the cockpit I ran the power cable for the electric fan (red & black) to the fan that is it at the bottom of the electric panel ) I set it up there for “easy” access in case there is problem with the electric fan in the future .and Also did not want to have the FAN running close to the AFT area in case somebody is sleeping while the FAN is running. Trying to keep the noise level at the sleeping area as low as possible
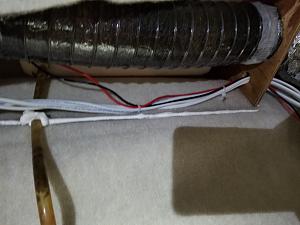
Click image for larger version

Name:	20180406_174838.jpg
Views:	4
Size:	144.3 KB
ID:	5384

Click image for larger version

Name:	20180406_175539.jpg
Views:	4
Size:	165.2 KB
ID:	5385
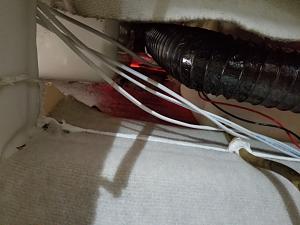
This is the air duct going to the Cockpit Vent
Click image for larger version

Name:	20180406_174833.jpg
Views:	5
Size:	147.0 KB
ID:	5386
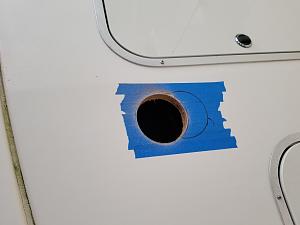
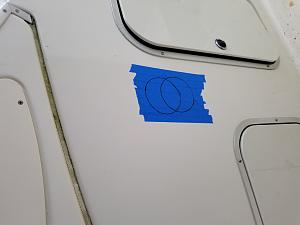
I also had to get a couple of shot of tequila , beer & what ever was available to get the courage to make a 4 inches hole on my new to me Boat. What a nightmare .. TIP… “ use a bigger tool than 4 “ maybe a 4 1/8” or even an 4 1/4 “ I did not used and It was a nightmare to get the air duct attached to the air vent at the cockpit . You need to attached the air duct right .. Do not forget :=)
Click image for larger version

Name:	20180324_142130.jpg
Views:	4
Size:	90.1 KB
ID:	5387

Click image for larger version

Name:	20180324_142718.jpg
Views:	5
Size:	84.5 KB
ID:	5388
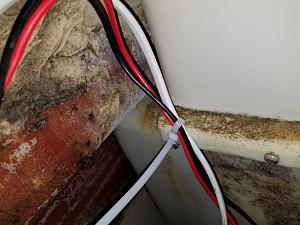
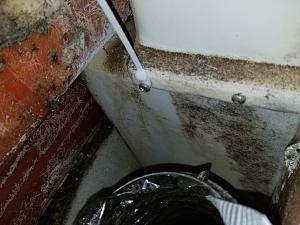
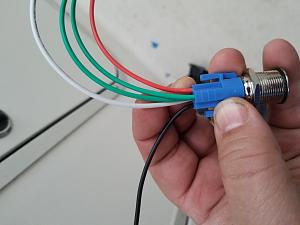
Also you will need to secure the cable that are going to the switch , There is a screw that you could use instead of making another hole .. I had enough with the big hole I made to the boat already … here is the screw I am talking about ( this screw is part of the cabinet in the cockpit)
Click image for larger version

Name:	20180401_155130.jpg
Views:	5
Size:	186.3 KB
ID:	5389

Click image for larger version

Name:	20180404_175933.jpg
Views:	4
Size:	199.9 KB
ID:	5390

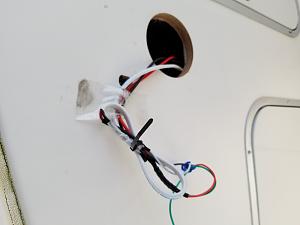
I had to secure the cable while I was working on the running air duct and cables to the fan and AFT area.. It worked since just fine I was like Batman…. I worked alone :P
Click image for larger version

Name:	20180401_154629.jpg
Views:	5
Size:	69.9 KB
ID:	5391


Click image for larger version

Name:	20180324_190110.jpg
Views:	5
Size:	113.4 KB
ID:	5392

Click image for larger version

Name:	Screenshot_20180401-025443.jpg
Views:	7
Size:	133.4 KB
ID:	5393


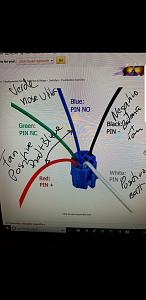
Here is the switch I used and the how is connected in order to get the light of the switch on only when the Cockpit FAN is on . Do not forget to fuse protect the power to the FAN.. That is another part of the project that I have to put the pictures together since I am redoing the electric distribution on my boat adding a third dedicated bank (two deep cycle parallel Group 31 Batteries in parallel just for the House) so each engine has it owns cranking battery . Do not want any lights or accessories running my engine batteries low. Thats another project that I am doing in parallel.

Take care Marcucho
Attached Thumbnails
20180326_171409.jpg  
marcucho is offline   Reply With Quote
Old 08-21-2018, 04:18 AM   #16
Lieutenant
 
Join Date: Jul 2017
Location: NC
Posts: 78
Thumbs up Just an update

This message is to give you an update of this Upgrade... I could not be happier with it. It actually cool off the area cockpit area when it is around 90 degree outside, your are docked and you just do not want to be bothered by the bugs .. It is great to have the cool air... Just add another stand alone fan to circulate the air in the area an you are going to be happy ... Wife approved :P
__________________

marcucho is offline   Reply With Quote
Reply


Posting Rules
You may not post new threads
You may not post replies
You may not post attachments
You may not edit your posts

BB code is On
Smilies are On
[IMG] code is On
HTML code is Off
Trackbacks are Off
Pingbacks are Off
Refbacks are Off


Powered by vBadvanced CMPS v3.2.3

All times are GMT. The time now is 08:13 AM.


Powered by vBulletin® Version 3.8.8 Beta 4
Copyright ©2000 - 2024, vBulletin Solutions, Inc.