 |
|
 06-03-2015, 05:13 AM
|
#1
|
|
Ensign
Join Date: May 2015
Posts: 12
|
 88 1700 I/O restoration
I just bought my first boat it's an 88 1700 openbow with a 3.0 mercruiser.
Engine was rebuilt two years ago amd the PO got MS so it only got about 10hrs of use over the last couple years. I had a mechanic check it over and all is good.
Hull is nice and clean with only one gouge that's not to bad and being fixed. It has a lot of sun fade in the gel coat bit it looks like it will buff out nicely.
Interior is rough. I thought I was gonna have to do a little work to the interior but once I started it quickly became obvious that the whe thing needed to be redone. So I started recovering some pieces and ended up saving only 5 of the original pieces of plywood, and all but 5 pieces of foam. The back to backs were garbage, but I found a set of nice Wize back to backs for $200 that match the new white perfectly. The interior has been a lot of work.
I knew the floor had a hole at the bow but once I started digging and stripping out all the carpet I found more. The floor and possibly the stringers is too much work for me so I dropped it off at a shop to get the floor redone while I finish the upholstery.
That's the basic intro I'll post up some pics later when I get photobucket sorted out.
__________________
|

|

|
 06-03-2015, 12:12 PM
|
#2
|
|
Admiral
Join Date: Feb 2012
Location: Essex, Maryland
Posts: 10,663
|
thanks for the run down and looking forward to the pictures.
__________________
__________________
1997 Silverton 362, 7.4 Crusaders
1997 2400 SCR, 5.7 Vortec / Bravo 2
Mike
|

|

|
 06-03-2015, 01:24 PM
|
#3
|
|
Lt. JG
Join Date: Jun 2015
Posts: 21
|
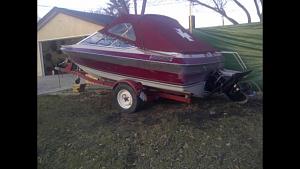 how it looked when I bought it.
|

|

|
 06-03-2015, 02:01 PM
|
#4
|
|
Lt. JG
Join Date: Jun 2015
Posts: 21
|
|

|

|
 06-03-2015, 03:12 PM
|
#5
|
|
Lt. JG
Join Date: Jun 2015
Posts: 21
|
|

|

|
 06-03-2015, 03:19 PM
|
#6
|
|
Lt. JG
Join Date: Jun 2015
Posts: 21
|
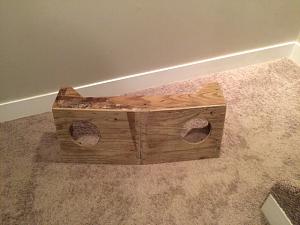
I started rebuilding the lower doghouse this week. I made ill get by just over and inch and moved the speaker location from the jump seats to the doghouse.
I'm going to enclose the back of the speakers from the engine and make the whole thing easily removable.
My goal with the interior is to make it so all the pieces can be dismounted for winter storage. I'll post up pictures of the setup once it's done in a couple weeks.
|

|

|
 06-03-2015, 03:21 PM
|
#7
|
|
Lt. JG
Join Date: Jun 2015
Posts: 21
|
Oh and you might notice the PO called it Fast Cash. Indeed it does suck up cash rather fast...
|

|

|
 06-03-2015, 04:20 PM
|
#8
|
|
Moderator
Join Date: Apr 2008
Posts: 5,704
|
Floor, stringers, transom. These are the three common places to look for rot. All three are fixable, however it can be costly.
|

|

|
 06-03-2015, 04:59 PM
|
#9
|
|
Lt. JG
Join Date: Jun 2015
Posts: 21
|
Thx. Transom looks good so far. The floor and stringers are being done.
|

|

|
 06-03-2015, 05:21 PM
|
#10
|
|
Admiral
Join Date: Feb 2012
Location: Essex, Maryland
Posts: 10,663
|
Quote:
Originally Posted by suprathepeg01

Oh and you might notice the PO called it Fast Cash. Indeed it does suck up cash rather fast...
|
I saw the name and thought yep that's what boats do. The sooner you can accept that the sooner you can enjoy boating. 
__________________
1997 Silverton 362, 7.4 Crusaders
1997 2400 SCR, 5.7 Vortec / Bravo 2
Mike
|

|

|
 06-03-2015, 05:31 PM
|
#11
|
|
Lt. JG
Join Date: Jun 2015
Posts: 21
|
Cars and boats $$$
|

|

|
 06-04-2015, 12:09 AM
|
#12
|
|
Lt. JG
Join Date: Jun 2015
Posts: 21
|
|

|

|
 06-04-2015, 12:15 AM
|
#13
|
|
Admiral
Join Date: Feb 2012
Location: Essex, Maryland
Posts: 10,663
|
Nice work, I am sure you verified there is clearance for the speakers 
__________________
1997 Silverton 362, 7.4 Crusaders
1997 2400 SCR, 5.7 Vortec / Bravo 2
Mike
|

|

|
 06-04-2015, 03:47 AM
|
#14
|
|
Lt. JG
Join Date: Jun 2015
Posts: 21
|
Yep I also extended the box to make extra room
|

|

|
 06-06-2015, 04:26 AM
|
#15
|
|
Lt. JG
Join Date: Jun 2015
Posts: 21
|
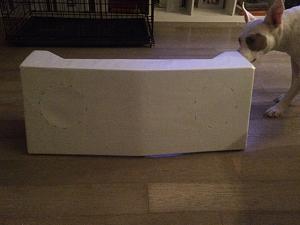
Covered the Lower doghouse today.
|

|

|
 06-06-2015, 12:39 PM
|
#16
|
|
Admiral
Join Date: Feb 2012
Location: Essex, Maryland
Posts: 10,663
|
Quote:
Originally Posted by suprathepeg01

|
And the dog gives his approval 
__________________
1997 Silverton 362, 7.4 Crusaders
1997 2400 SCR, 5.7 Vortec / Bravo 2
Mike
|

|

|
 06-07-2015, 01:32 AM
|
#17
|
|
Lt. JG
Join Date: Jun 2015
Posts: 21
|
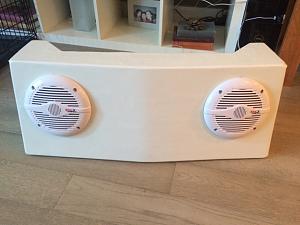 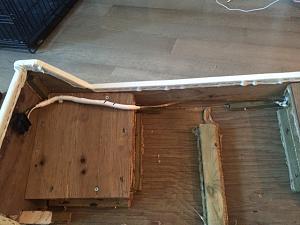
Speakers installed. Wired them with a 4 pin trailer connector for servicing the engine etc.
|

|

|
 06-08-2015, 01:23 AM
|
#18
|
|
Lt. JG
Join Date: Jun 2015
Posts: 21
|
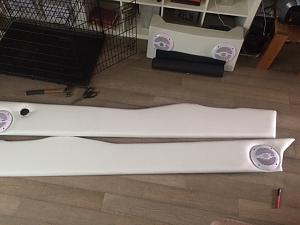 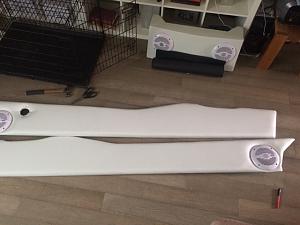
The last of the interior pieces are covered. Well over 2500 staples...
|

|

|
 06-08-2015, 02:40 AM
|
#19
|
|
Lt. JG
Join Date: Jun 2015
Posts: 21
|
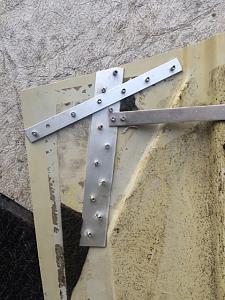
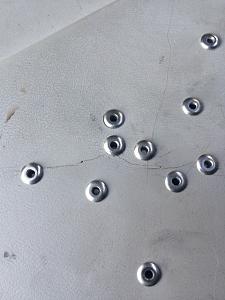
The upper doghouse was cracking on both sides from people sitting on it so I used a couple pieces of aluminum to shore up the cracks and added vertical supports so people can sit on it for another 20 years. I'm gonna get some colour matched paint and paint it to match the new vinyl upholstery so all the ugly revits won't be so visible.
|

|

|
 06-08-2015, 03:24 AM
|
#20
|
|
Admiral
Join Date: Feb 2012
Location: Essex, Maryland
Posts: 10,663
|
What gauge aluminum did you use?
IMO I would have used glass mat to stiffen the area.
__________________
__________________
1997 Silverton 362, 7.4 Crusaders
1997 2400 SCR, 5.7 Vortec / Bravo 2
Mike
|

|

|
 |
|
 Posting Rules
|
You may not post new threads
You may not post replies
You may not post attachments
You may not edit your posts
HTML code is Off
|
|
|
|
 » Recent Threads
 |
|
|
|
|
|
|
|
|
|
|
|
|
|
|
|
|
|
|
|
|
|