 |
|
 02-08-2012, 06:05 PM
|
#1
|
|
Lieutenant
Join Date: Jun 2010
Location: CT
Posts: 61
|
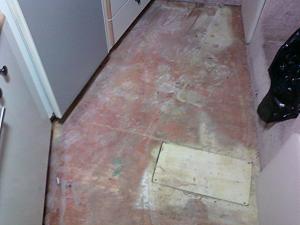
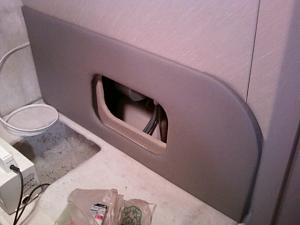
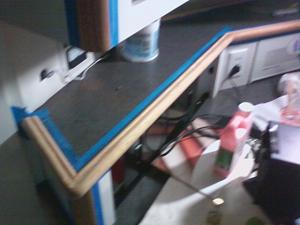
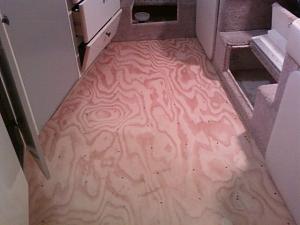
 3200 New Interior
Hi All,
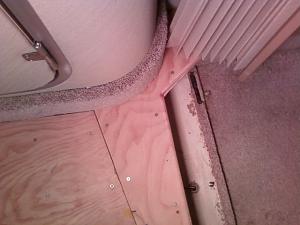
Just wanted to show some progress photos of my 1994 3200scr interior reno.
Some of the mods;
New seating covers
new flooring
electrical outlet at starboard table top
helm windlass wiring to dash
DC outlet near electrical panel
3" air cond. vent in head
__________________
|

|

|
 02-08-2012, 06:46 PM
|
#2
|
|
Admiral
Join Date: Nov 2005
Location: Everett Wa
Posts: 4,681
|
looks good so far...but don'tcha need some carpeting laid down??...just kidding...
SP
__________________
__________________
Don't compare your life to others. You have no idea what their journey is all about. 
------------------------
SSN683 Association member 
Par Excellence
------------------------------
2008 Bayliner 340 - "Wild Whim"
--------------------------------------
I live in my own little world....but it's okay-they know me here!!! 
Avid practitioner of the martial art: KLIK-PAO. 
Tap-Rack-Bang
Anyone that sez "Size doesn't matter" has never owned a boat!
|

|

|
 02-08-2012, 08:24 PM
|
#3
|
|
Lieutenant
Join Date: Jan 2010
Location: Wilmington Delaware
Posts: 98
|
Sir
How did you get the back part of the sofa off. I need to remove it to replace my ac unit on a 3700 scr
|

|

|
 02-09-2012, 12:08 PM
|
#4
|
|
Lieutenant
Join Date: Jun 2010
Location: CT
Posts: 61
|
Quote:
Originally Posted by William Ferrell

Sir
How did you get the back part of the sofa off. I need to remove it to replace my ac unit on a 3700 scr
|
On my boat they screwed the pieces to the wall. The screws were screwed in thru the "cloth" material at inconspicuous places (at bottoms or inside corners). You have to look carefully but you will find tiny holes in the fabric. Then stuck my cordless philips in the hole and hunted around till I heard or felt a screw. They used around 4 to 6 screws per piece about 3/4" to 1" in from an edge.
Some of the other panels like the forward settee was secured thru the back, and I had to act like a pretzel to get at some of the screws.
Patience is your best friend here.
My biggest fear is in the reverse order my new "vinyl" fabric may bite the bit and twist while inserting the screw. May have to use some lube or precut a hole so it wont catch.
|

|

|
 02-09-2012, 12:10 PM
|
#5
|
|
Lieutenant
Join Date: Jun 2010
Location: CT
Posts: 61
|
I kinda like the natural plywood look- it's non-slip and you can sand it if you drop stuff on it!
|

|

|
 02-09-2012, 06:08 PM
|
#6
|
|
Commander
Join Date: Sep 2010
Location: Chatlotte, NC (Lake Norman)
Posts: 253
|
looks great, keep sharing the pictures.
\
__________________
David & Carol
Charlotte, NC (Lake Norman)
3700 SCR "Comfortably Numb"
|

|

|
 02-14-2012, 03:45 PM
|
#7
|
|
Lieutenant
Join Date: Jun 2010
Location: CT
Posts: 61
|
Here is a pic of the adjustable vent for the Head. The larger one is a 4" replacement for one that broke in the aft cabin, the 3" smaller is the new Head vent. Both are adjustable in direction and CFM.
I'll take some pics this weekend of the hose routing from the A/C to the head and post them for those that may want to attempt this themselves. It was relatively easy to add the A/C to the head.
|

|

|
 02-14-2012, 06:19 PM
|
#8
|
|
Moderator
Join Date: Apr 2008
Posts: 5,704
|
Looks Great!!! What are you replacing the carpet on the cabin sole with? Carpet? If so, is putting down a new layer of luan necessary? I'm thinking of redoing my cabin carpetting as well.
|

|

|
 02-15-2012, 11:57 AM
|
#9
|
|
Lieutenant
Join Date: Jun 2010
Location: CT
Posts: 61
|
Quote:
Originally Posted by shrew

Looks Great!!! What are you replacing the carpet on the cabin sole with? Carpet? If so, is putting down a new layer of luan necessary? I'm thinking of redoing my cabin carpetting as well.
|
No, I am putting in a product called Amtico. It's a vinyl 3" wide plank type floor that looks like wood. It comes 3" x 36" planks and you glue them down over the floor leveler stuff. Since I am stripping all the wood work of that whitewash and leaving it natural oak with a clear coat, the oak look flooring will match nicely.
I originally thought of real wood flooring, but it would get scratched to much.
If you are putting down carpeting, you are right, no luan is necessary.
|

|

|
 02-16-2012, 06:51 AM
|
#10
|
|
Lt. Commander
Join Date: Oct 2006
Location: Liberty Lake, WA... moored on Beautiful Coeur D' Alene Lake, ID
Posts: 199
|
Horizon; I've also wanted to add another heating/AC duct to my 2900 SCR... and thought it would be fairly easy to do. But I wanted to add it to the rear salon/outside, to provide heat when she's isinglass'd-up in the Spring and Fall. It would be great to also add a vent in the head, as it can get very cold there on Spring/Fall mornings. But my head is on the opposite side of the current ducting (starboard, vents/ducting is to port). I presume the head on your 3200 is on the same side (to port it looks like from the pictures)?---or am I seeing that wrong?
In order to put ducting/pipe/hose (whatever) to the opposite side of my 2900 SCR, I'd have to drill large (3"+ anyway) holes through the stringers under the flooring I believe... a task I don't think I want to tackle. Or come from the heat pump located under the V-berth and try to fish it behind the inside walls clear back to the head. I don't thinks that area is accessable, has anyone done that yet?
__________________
Jeff Means
|

|

|
 02-17-2012, 04:00 PM
|
#11
|
|
Lieutenant
Join Date: Jun 2010
Location: CT
Posts: 61
|

Quote:
Originally Posted by jeffmeans

Horizon; I've also wanted to add another heating/AC duct to my 2900 SCR... and thought it would be fairly easy to do. But I wanted to add it to the rear salon/outside, to provide heat when she's isinglass'd-up in the Spring and Fall. It would be great to also add a vent in the head, as it can get very cold there on Spring/Fall mornings. But my head is on the opposite side of the current ducting (starboard, vents/ducting is to port). I presume the head on your 3200 is on the same side (to port it looks like from the pictures)?---or am I seeing that wrong?
In order to put ducting/pipe/hose (whatever) to the opposite side of my 2900 SCR, I'd have to drill large (3"+ anyway) holes through the stringers under the flooring I believe... a task I don't think I want to tackle. Or come from the heat pump located under the V-berth and try to fish it behind the inside walls clear back to the head. I don't thinks that area is accessable, has anyone done that yet?
|
Hi jeffmeans,
The head on the 3200 is on the opposite side (starboard)from my A/C unit (port).
I had to drill a 3 1/4" hole in the floor where the unit sits (under the stairs).
There are already wires and hoses that go thru my stringers- so I used those holes. You can access that area by removing a panel where the step riser is in the aft cabin. It is the access for the shower pump and fresh water tank.
I will take some pics tomorrow and post them on Monday to show the route. Hopefully those that want to do this project will see that for the 3200 it was pretty easy. Only had to drill that one hole.
|

|

|
 02-17-2012, 05:57 PM
|
#12
|
|
Lt. Commander
Join Date: Oct 2006
Location: Liberty Lake, WA... moored on Beautiful Coeur D' Alene Lake, ID
Posts: 199
|
Although our heat pump locations are different (mine's under the V-berth to port) I'm looking forward to the steps you took to "tap-in" to the ducting/hose. When I thought about doing a 3rd vent to the outside salon, I anticipated cutting into the mid-berth hose about 18" "before" it fits onto the actual wall vent. But, like all projects on boats... gaining ACCESS to the air hose to cut it (behind the inside wall) and then installing a "Y-splitter" to branch-off to the new vent (and continue on to the existing vent) would be nearly impossible. Although there's lots of "slack" in the hose just before it hooks up to the wall vent (again, in the mid-berth) it's quite a reach from the hot water tank door (where I'd gain access). My fear was I could certainly disconnect the hosing from behind the wall... but getting it RE-connected after installing the Y-splitter wouldn't happen! Then I'd be stuck with NO heat/air in the mid-berth.
Either way, looking forward to your pics...
__________________
Jeff Means
|

|

|
 02-17-2012, 06:05 PM
|
#13
|
|
Moderator
Join Date: Apr 2008
Posts: 5,704
|
Quote:
Originally Posted by Horizon

No, I am putting in a product called Amtico. It's a vinyl 3" wide plank type floor that looks like wood. It comes 3" x 36" planks and you glue them down over the floor leveler stuff. Since I am stripping all the wood work of that whitewash and leaving it natural oak with a clear coat, the oak look flooring will match nicely.
I originally thought of real wood flooring, but it would get scratched to much.
If you are putting down carpeting, you are right, no luan is necessary.
|
Very Nice. I sanded, stained and varnished all my pickled wood as well. I was going to leave it natural as well, until I got under the pickling and found they had used poplar with that greenish tint to it. I stained it a med-light color and many coats of a satin varnish.
|

|

|
 02-19-2012, 12:15 PM
|
#14
|
|
Lieutenant
Join Date: Jun 2010
Location: CT
Posts: 61
|
Hi All,
Here are the pics of the final project for the A/C mod.
I can only attach 5 pics per post. See next post. 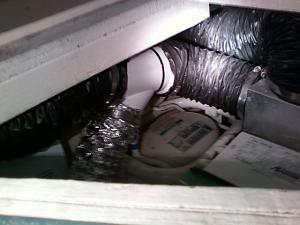 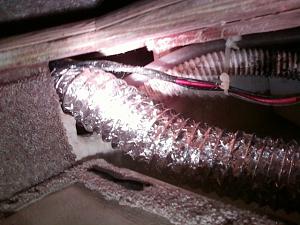 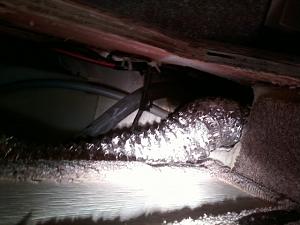 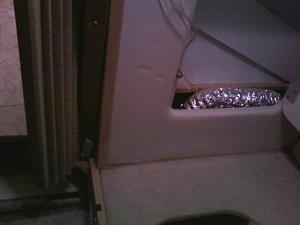
|

|

|
 02-19-2012, 12:47 PM
|
#15
|
|
Lieutenant
Join Date: Jun 2010
Location: CT
Posts: 61
|
[QUOTE=Horizon;20880]Hi All,
Here are the pics of the final project for the A/C mod. See attached.
Description of route:
From under stairs, go thru 3 1/4" hole that you drilled in the floor,
Thru existing hole in stringer to opposite stringer hole,
up and over the fresh water pump (located in the false bottom aft cabin locker),
down and forward length of head,
up to newly drilled 3" hole and new vent.
See diagram.
Of course i don't even know if this will work well, the boat is still under wraps. But anything is better than nothing in that head. It gets pretty hot in there in the summer.
|

|

|
 02-20-2012, 01:14 AM
|
#16
|
|
Lieutenant
Join Date: Feb 2012
Location: Poulsbo WA
Posts: 59
|
Keep posting more pics. I just bought JBScheff's '96 3200. 
__________________
Life is a Journey. Enjoy the ride. "Aurora" 1996 Maxum 3200 SCR - Poulsbo, WA
|

|

|
 02-20-2012, 12:02 PM
|
#17
|
|
Lieutenant
Join Date: Jun 2010
Location: CT
Posts: 61
|
Quote:
Originally Posted by MCM

Keep posting more pics. I just bought JBScheff's '96 3200.  |
Congrats, the 3200 is a great boat.
Enjoy
|

|

|
 02-20-2012, 04:45 PM
|
#18
|
|
Lieutenant
Join Date: Feb 2012
Location: Poulsbo WA
Posts: 59
|
Quote:
Originally Posted by Horizon

Congrats, the 3200 is a great boat.
Enjoy
|
I'm learning that it is a great boat...a great big boat. After two days of cleaning and and buffing the hull, I can barely move my arms.
__________________
Life is a Journey. Enjoy the ride. "Aurora" 1996 Maxum 3200 SCR - Poulsbo, WA
|

|

|
 02-20-2012, 10:22 PM
|
#19
|
|
Admiral
Join Date: Nov 2005
Location: Everett Wa
Posts: 4,681
|
they have a habit of growing the more you put wax on it.....congrats on the new member of the family....
SP
__________________
Don't compare your life to others. You have no idea what their journey is all about. 
------------------------
SSN683 Association member 
Par Excellence
------------------------------
2008 Bayliner 340 - "Wild Whim"
--------------------------------------
I live in my own little world....but it's okay-they know me here!!! 
Avid practitioner of the martial art: KLIK-PAO. 
Tap-Rack-Bang
Anyone that sez "Size doesn't matter" has never owned a boat!
|

|

|
 02-21-2012, 11:47 AM
|
#20
|
|
Lieutenant
Join Date: Jun 2010
Location: CT
Posts: 61
|
[QUOTE=Horizon;20881]
Quote:
Originally Posted by Horizon

Hi All,
Here are the pics of the final project for the A/C mod. See attached.
Description of route:
From under stairs, go thru 3 1/4" hole that you drilled in the floor,
Thru existing hole in stringer to opposite stringer hole,
up and over the fresh water pump (located in the false bottom aft cabin locker),
down and forward length of head,
up to newly drilled 3" hole and new vent.
See diagram.
Of course i don't even know if this will work well, the boat is still under wraps. But anything is better than nothing in that head. It gets pretty hot in there in the summer.
|
I forgot to mention- Don't forget to put a healthy dab of silicone caulk around the duct going thru the floor or else you will be introducing bilge smell into your air cond. - but you already knew that!
|

|

|
 |
|
 Posting Rules
|
You may not post new threads
You may not post replies
You may not post attachments
You may not edit your posts
HTML code is Off
|
|
|
|
 » Recent Threads
 |
|
|
|
|
|
|
|
|
|
|
|
|
|
|
|
|
|
|
|
|
|